
Shopping Cart
Sub Total:
$0
Total:
$0

Claim: Owners who swap in a compatible rear lower cushion and matching seatback report being able to carry long gear, like skis and a snowboard, through the center pass-through, transforming the WRX from tight-sport car to practical-gear hauler. Community guides and tech threads document the swap and fitment experiences.
Quick summary What this mod is and how it works Compatibility: which years and chassis fit Tools, parts, and where to find them Step-by-step rear lower seat removal Installing the donor lower cushion and seatback Troubleshooting and fitment tips Risks, safety, and legal notes FAQs Recommended resources and CTA
| Takeaway | Why it matters |
|---|---|
| Swap goal | Enable a center fold-down pass-through or refresh lower cushion for comfort and cargo flexibility |
| Typical donor | WRX/STI/Impreza seats from the same chassis group, often from higher trims or wagons/hatchbacks |
| Difficulty | Beginner to intermediate, basic tools plus care removing clips and bolts |
| Estimated cost | $50 to $300+, depending on source and condition |
This project swaps the rear lower seat cushion in your Subaru WRX for a compatible one that mates with a folding center armrest and pass-through in the seatback, or simply replaces a worn, “humped” lower cushion with a flatter one. The mod can be as simple as changing the bottom cushion, or as involved as swapping both the lower cushion and the upper backrest so the fold-down armrest functions.
Mechanically, the lower cushion is retained with a combination of clips and bolts. The cushion itself often slides into hooks and clips at the rear edge and latches forward, then the seatback assembly is bolted to the car structure. A donor upper seatback with a factory fold-down armrest provides the actual pass-through opening, while the donor lower cushion must physically mate to that backrest so the latch and alignment work as intended.
Subaru used modular seat components across generations and trim levels. Many rear lower cushions are interchangeable between models within the same chassis family, so a donor cushion from a higher-trim or different body style can provide the missing pass-through geometry or a flatter seating surface. Community experience documents these cross-fits across GD/GG, GR/GV, and VA chassis families.
Compatibility is the #1 question for anyone thinking about a WRX rear lower seat swap. Fitment depends on chassis, body style, and seat trim. Use this as a rule-of-thumb checklist.
Short answer to People Also Ask: What years of WRX rear seats are interchangeable? Within each chassis family, seats are commonly interchangeable, for example GD-era donor seats will generally fit GD-era cars; GR to GR, VA to VA. There are exceptions for hatch vs sedan within a family because mounting points or seatback geometry may differ. Community swap threads and fitment posts describe these groupings and practical experiences.
| Chassis | Years | Common swap notes |
|---|---|---|
| GD/GG | 2002–2007 | Many hatch and sedan seat parts interchangeable, JDM armrest seats exist |
| GR/GV | 2008–2014 | Slight variations, but seat bottoms frequently swap; check seatbelt buckle mounts |
| VA | 2015–2023 | VA seats are different in foam shaping; some cross-over pieces fit within VA family |
Answer: The lower cushion might fit between sedan and wagon/hatch within the same chassis, but the seatbacks and the rear deck geometry can differ. Expect small trim and bracket differences, so check anchor points and test-fit before committing. If you need the folding armrest to work you will likely need the matching upper seatback with brackets.
Real examples: Enthusiasts report successfully using GD-era JDM seatbacks to add a pass-through in USA-spec WRX sedans, but trimming or bracket adjustments were required.
No fancy shop gear is required, but gather the basics listed below.
Will the WRX rear seat be held in by bolts or clips? It is usually a combination of bolts for the seatback brackets and robust clips or hooks for the lower cushion. The cushion often snaps into rear hooks then clips forward. Expect to use trim tools to release clips, and sockets for the fasteners.
Good sources include pull-a-part junkyards, NASIOC and IWSTI forums, Facebook Marketplace, eBay, and specialist sellers. Expect ranges from roughly $50 to $75 at a salvage yard, up to $150 to $300+ for part-outs or nicer sets online.
Cost summary: junkyard low end $50 to $75, part-out or online used $150 to $300+, full new OEM replacement significantly more.
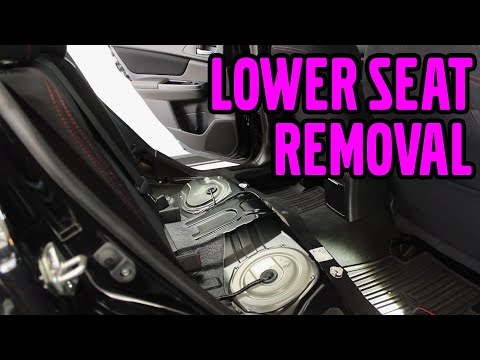
Below is a careful walkthrough aimed at beginners to intermediate DIYers. Read fully before starting, and take photos as you go. Several visual tutorials exist and they match this workflow.
Inspect the front edge of the lower cushion, the rear hooks under the lip, and the seatback mounting bolts. On many WRX models, the lower cushion tucks into hooks at the rear and has a forward-engaging clamp. The seatback itself is bolted to either the floor or the seat belt anchor points.
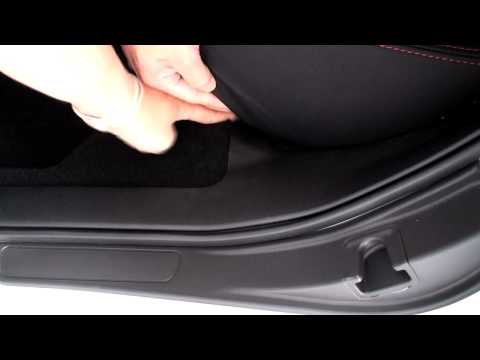
Reach under the rear of the cushion, feel for the hook points, and pull up while levering the cushion forward. Use a plastic pry if needed to avoid cutting upholstery. You will usually feel the cushion disengage from the hooks.
After rear hooks release, lift the rear of the cushion, then slide the cushion forward to unseat the forward-retaining clips. Some models use two forward clips you must depress or pry to release. Save any push-clips if undamaged.
If your model routes seat belt buckles through the cushion, unbolt the buckles first using the appropriate socket. Note wiring for occupancy sensors is usually under the lower cushion on modern vehicles; disconnect gently if present.
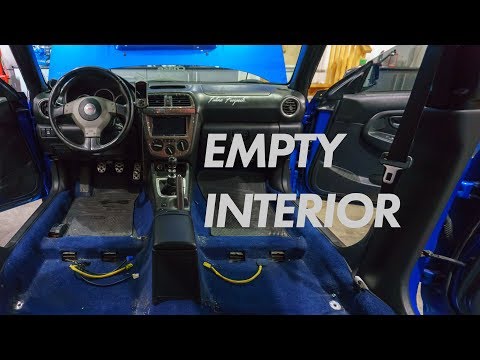
Follow step-by-step video examples for your exact year; most popular removal videos show identical fasteners and demonstrate the correct pull angle for the cushion. Example removal videos show the cushion sliding back and up to clear the rear hooks.
Airbag and occupancy sensor wiring may be present beneath or in brackets near the seat. If you encounter an electrical connector, document location, unplug carefully using a tab, and tape connectors for reassembly. If unsure, disconnect the battery before unplugging SRS-connected plugs and consult a shop manual.
Now that you have the donor lower cushion and possibly the donor seatback, follow these steps to install.
Slide the front edge into the forward clips, press rear into hooks, then sit the cushion to ensure it locks. If it does not seat, do not force it. Identify the interference point and examine whether a clip, bracket, or small trim piece is blocking the fit.
If your goal is a WRX rear seat pass through or a folding armrest, you will usually need the entire upper seatback that contains the folding armrest and pass-through. Remove original upper bolts, lift out the old backrest, and align the donor backrest mounting studs. Bolt to factory torque where required. Check that the fold-down latch operates freely.
Reconnect any wiring and fasten seat belt buckles. Use torque specs from a factory manual if available. If you moved occupancy sensors, make sure the connector is secure and properly routed to avoid pinching.
Pro tip: Keep all removed bolts and clips in labeled bags so they are easy to reinstall. Photograph each step to make reassembly straightforward.
Short answer: For the same generation and body style, almost always yes, and STI seats are frequently used as upgrades; verify mounting points and harnesses first. Community swaps show many successful conversions.
This section covers what can go wrong and how to prevent it.
| Risk category | Examples |
|---|---|
| Physical | Damaging upholstery, snapped clips, or bent brackets during removal/installation |
| Electrical | Disconnecting occupancy sensor improperly causing airbag light or chime |
| Legal | Modifying SRS components or seat belts can affect crashworthiness and vehicle safety inspections |
Before you begin, remember that seat belts and SRS systems are safety critical. If your swap touches pretensioners, seat belt anchors, or airbag sensors, consult a professional. Reinstall bolts to manufacturer torque values when available, and verify any electrical connectors are secure. Performing seat work incorrectly can create safety hazards in a crash.
Cost summary for the swap: Expect about $50 to $75 from salvage, $150 to $300+ for online or part-out seats. Factor in new clips and possibly professional help if SRS wiring is involved.
Legal note, USA: Vehicle safety systems are regulated; altering seat mounts, anchors, or airbag devices may affect compliance with vehicle inspection rules or insurance. If in doubt, consult a qualified shop.
For the WRX owner who skis, surfs, or carries long gear, adding a center pass-through or flattening the rear lower cushion adds a practical capability without sacrificing the sporty interior. For enthusiasts who restore interiors or reduce wear, this is a relatively low-cost mod with high functional impact.
An example: One owner swapped in a GD-era JDM seatback with a pass-through, and could carry a snowboard lengthwise without folding rear seats, creating a more usable daily driver for winter trips. Community documentation and posts highlight how this mod increases cargo versatility.
Mostly within the same chassis group: GD/GG, GR/GV, and VA. Cross-generation swaps require careful checks.
Basic socket set, trim tools, Torx bits, pliers, and optionally a torque wrench. No exotic tools needed.
The lower cushion might fit, but seatbacks and mounting geometry can differ; test-fit or source both upper and lower pieces if possible.
Release rear hooks, lift the cushion, then unclip forward retainers. Unbolt any seatbelt hardware or sensors first. Watch a year-specific video for visuals.
Check junkyards, NASIOC, IWSTI, Facebook Marketplace, eBay, and specialist sellers. Prices vary widely.
Limited often includes a folding armrest and pass-through; base trims may have a fixed hump or no armrest. Swap requires the matching upper backrest for full function.
Yes, but you normally need the donor upper seatback that contains the armrest and matching lower cushion for fitment.
Both: robust clips/hooks for the cushion and bolts for the backrest and belt anchors.
Approximately $50–$75 salvage, $150–$300+ online, not including labor if you pay a shop.
In most cases for the same generation and body style, yes. Verify anchor points and harnesses.
Reference guides and community threads are invaluable for details on your exact model and year. Start here:
Ready to swap? Gather parts, read your specific year thread, and follow the step-by-step sections above. If you want pro help, select a local shop experienced with Subaru interiors.
Legal and safety disclaimer: This article is for informational purposes only. Consult a qualified mechanic if you are unsure. Mods affecting seat belts or airbag systems may affect vehicle safety and insurance. This article is not a substitute for professional service.
The WRX rear lower seat swap is a practical, high-value mod for many owners. It blends utility with relatively low cost when you find the right donor parts. While not every swap is purely bolt-on, the community knowledge base and step-by-step video guides make it approachable. If you value both form and function, investing a weekend and the right donor components can pay dividends every ski trip and cargo run.
Counterpoint: If you are uncomfortable with SRS wiring or structural brackets, or if the donor does not match at all, the safest path is to source the complete OEM set for your chassis family or hire a shop. That approach sacrifices DIY savings but guarantees safety and fitment.
Research notes: Community threads and videos document this mod extensively. For technical removal and fitment visuals, consult dedicated removal videos and model-specific forum threads.
Internal link examples: Impreza/WRX rear seats product page, Subie interior parts category.
Suggested related reading: How to diagnose a bad Subaru radiator fan and other DIY guides on Genuine Subie Parts.


Recent Comment
Be the first to comment